Fix Windows 10/11 Video Scheduler Internal Error
Are you experiencing the Windows 10/11 Video Scheduler Internal Error? Let’s explore some potential solutions to fix this frustrating issue.
Understanding the Error: Causes and Symptoms
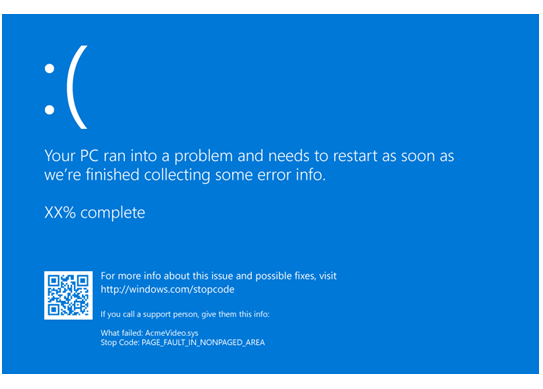
The Video Scheduler Internal Error in Windows 10/11 can be caused by various factors, leading to different symptoms. Common causes include issues with the graphics card, system file corruption, or faulty device drivers. Symptoms of this error can range from frequent system crashes to graphical glitches during video playback or gaming.
If you suspect a hardware issue, check the graphics card and ensure it’s properly connected. Dust and poor airflow can also cause overheating, so clean the inside of your computer if necessary.
Corrupted system files can be resolved by running CHKDSK or System File Checker to repair any issues. Malware or viruses can also be a cause, so perform a full scan using Microsoft Defender Antivirus.
Updating or reinstalling device drivers can often resolve compatibility issues and prevent the Video Scheduler Internal Error from occurring.
Backing up important data before troubleshooting is crucial to prevent data loss in case of a system failure. Consider using the Command-line interface to access system tools for troubleshooting if the error prevents normal booting.
Quick Fixes to Address the Issue
- Update Graphics Drivers
- Open the Device Manager by right-clicking on the Start button and selecting it from the menu.
- Expand the Display adapters category.
- Right-click on your graphics card and select Update driver.
- Choose Search automatically for updated driver software and follow the on-screen instructions.
- Run Windows Memory Diagnostic
- Open the Start menu and type Windows Memory Diagnostic.
- Click on the Windows Memory Diagnostic app from the search results.
- Choose Restart now and check for problems.
- Wait for the computer to restart and perform the memory diagnostic test.
- Check for Windows Updates
- Open Settings by pressing Windows key + I.
- Click on Update & Security.
- Click on Check for updates and install any available updates.
Running System and Malware Scans
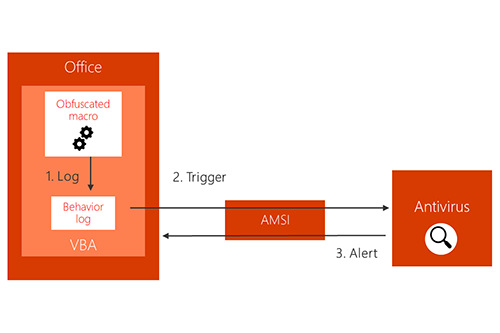
To fix the Video Scheduler Internal Error on Windows 10/11, it’s important to run system and malware scans to identify and remove any potential issues. Run a full system scan using Microsoft Defender Antivirus to check for viruses and malware. This will help to ensure that your system is clean and free from any harmful software that may be causing the error. Additionally, run a CHKDSK scan to check for any bad sectors on your hard drive. This will help to identify and repair any potential issues with your storage drive that could be contributing to the error.
After running the system and malware scans, use the System File Checker tool to scan and repair any corrupted system files. This can help to resolve any underlying issues within the operating system that may be causing the Video Scheduler Internal Error. It’s also a good idea to make sure your device drivers are up to date, as outdated or corrupt drivers can sometimes cause this type of error.
By running these scans and checks, you can effectively identify and address any potential issues that may be contributing to the Video Scheduler Internal Error on your Windows 10/11 system.
Additionally, Fortect can automatically fix damaged DLL files that are crucial for the proper functioning of programs. However, it does not specifically address video scheduler error windows 10, so it may not be able to fix that particular issue.
Updating and Reinstalling Graphics Drivers
To fix the Video Scheduler Internal Error in Windows 10/11, a common solution is to update or reinstall your graphics drivers. Start by pressing Windows Key + X and selecting Device Manager. Look for the “Display adapters” category, right-click on your graphics card, and select “Update driver. ” If that doesn’t solve the issue, you can also try uninstalling the driver by right-clicking on your graphics card and selecting “Uninstall device. ” Afterward, restart your computer and Windows will automatically reinstall the graphics driver. If that still doesn’t work, you can download the latest driver from the manufacturer’s website and install it manually.
Utilizing Windows System Tools: CHKDSK and SFC
To fix the Video Scheduler Internal Error in Windows 10/11, you can utilize the built-in Windows System Tools CHKDSK and SFC. First, run a CHKDSK scan to check for any disk errors and fix them. To do this, open Command Prompt as an administrator, then type “chkdsk /f” and press Enter. This will schedule a disk check for the next system reboot.
Next, run an SFC scan to repair any corrupted system files. Open Command Prompt as an administrator, then type “sfc /scannow” and press Enter. This will initiate the system file check.
After both scans are complete, restart your computer and see if the Video Scheduler Internal Error is resolved. If not, you may need to consider further troubleshooting or seek professional assistance.
Installing Essential Windows Updates
To fix the Video Scheduler Internal Error in Windows 10/11, it’s essential to ensure that your system has all the necessary updates installed. Open the Settings app and navigate to Update & Security. Click on Windows Update and then select Check for Updates. If any updates are available, make sure to install them to ensure that your system is up to date. It’s also a good idea to restart your computer after installing updates to make sure they are properly applied. Keeping your system updated can help prevent errors and improve overall performance.
Performing System Reset and Factory Reset Techniques
Performing a system reset or factory reset can help resolve the Windows 10/11 Video Scheduler Internal Error. To perform a system reset, go to Settings > Update & Security > Recovery and select Reset this PC. Follow the on-screen instructions to complete the process.
If a system reset does not resolve the issue, you can perform a factory reset. To do this, go to Settings > Update & Security > Recovery and select Get started under the “Reset this PC” section. Choose the option to remove everything and reinstall Windows.
Make sure to back up any important data before performing a reset, as it will erase all files and settings on your computer. After the reset is complete, re-install any necessary programs and restore your backed-up files.
It’s important to be cautious and address any video scheduler error messages in Windows 10 promptly to ensure smooth functioning of your system. Download this tool to run a scan


