Why does my Windows 10 WiFi keep disconnecting? [Solved]
Are you tired of being constantly disconnected from your Windows 10 WiFi? Look no further! In this article, we delve into the common causes behind this frustrating issue and provide you with effective solutions to keep your WiFi connection stable. Say goodbye to those annoying disconnects once and for all!
Common Causes of WiFi Disconnections
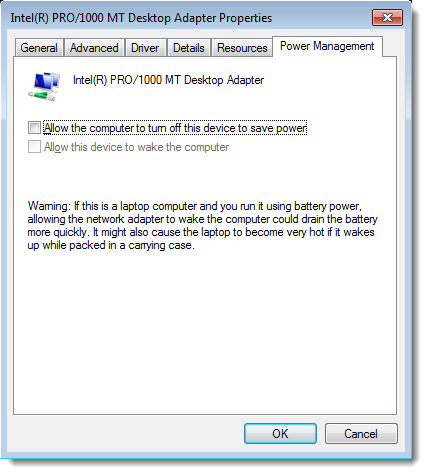
If your Windows 10 WiFi keeps disconnecting, there are a few common causes and solutions to consider. One frequent issue is outdated or incompatible network adapter drivers. To fix this, update your driver software through the Device Manager. Another reason could be power management settings. To resolve this, go to the Device Manager, right-click on your network adapter, and select Properties.
Then, navigate to the Power Management tab and uncheck the option to “Allow the computer to turn off this device to save power. ” Additionally, router software updates can help address connectivity problems. Check your router manufacturer’s website for the latest updates. Finally, ensure that your WiFi network is password-protected to prevent unauthorized access. By addressing these common causes, you can enjoy a stable and uninterrupted internet connection.
Quick Fixes for WiFi Disconnecting Issues on Windows 10
- Unplug the power cables from both your router and modem.
- Wait for at least 30 seconds.
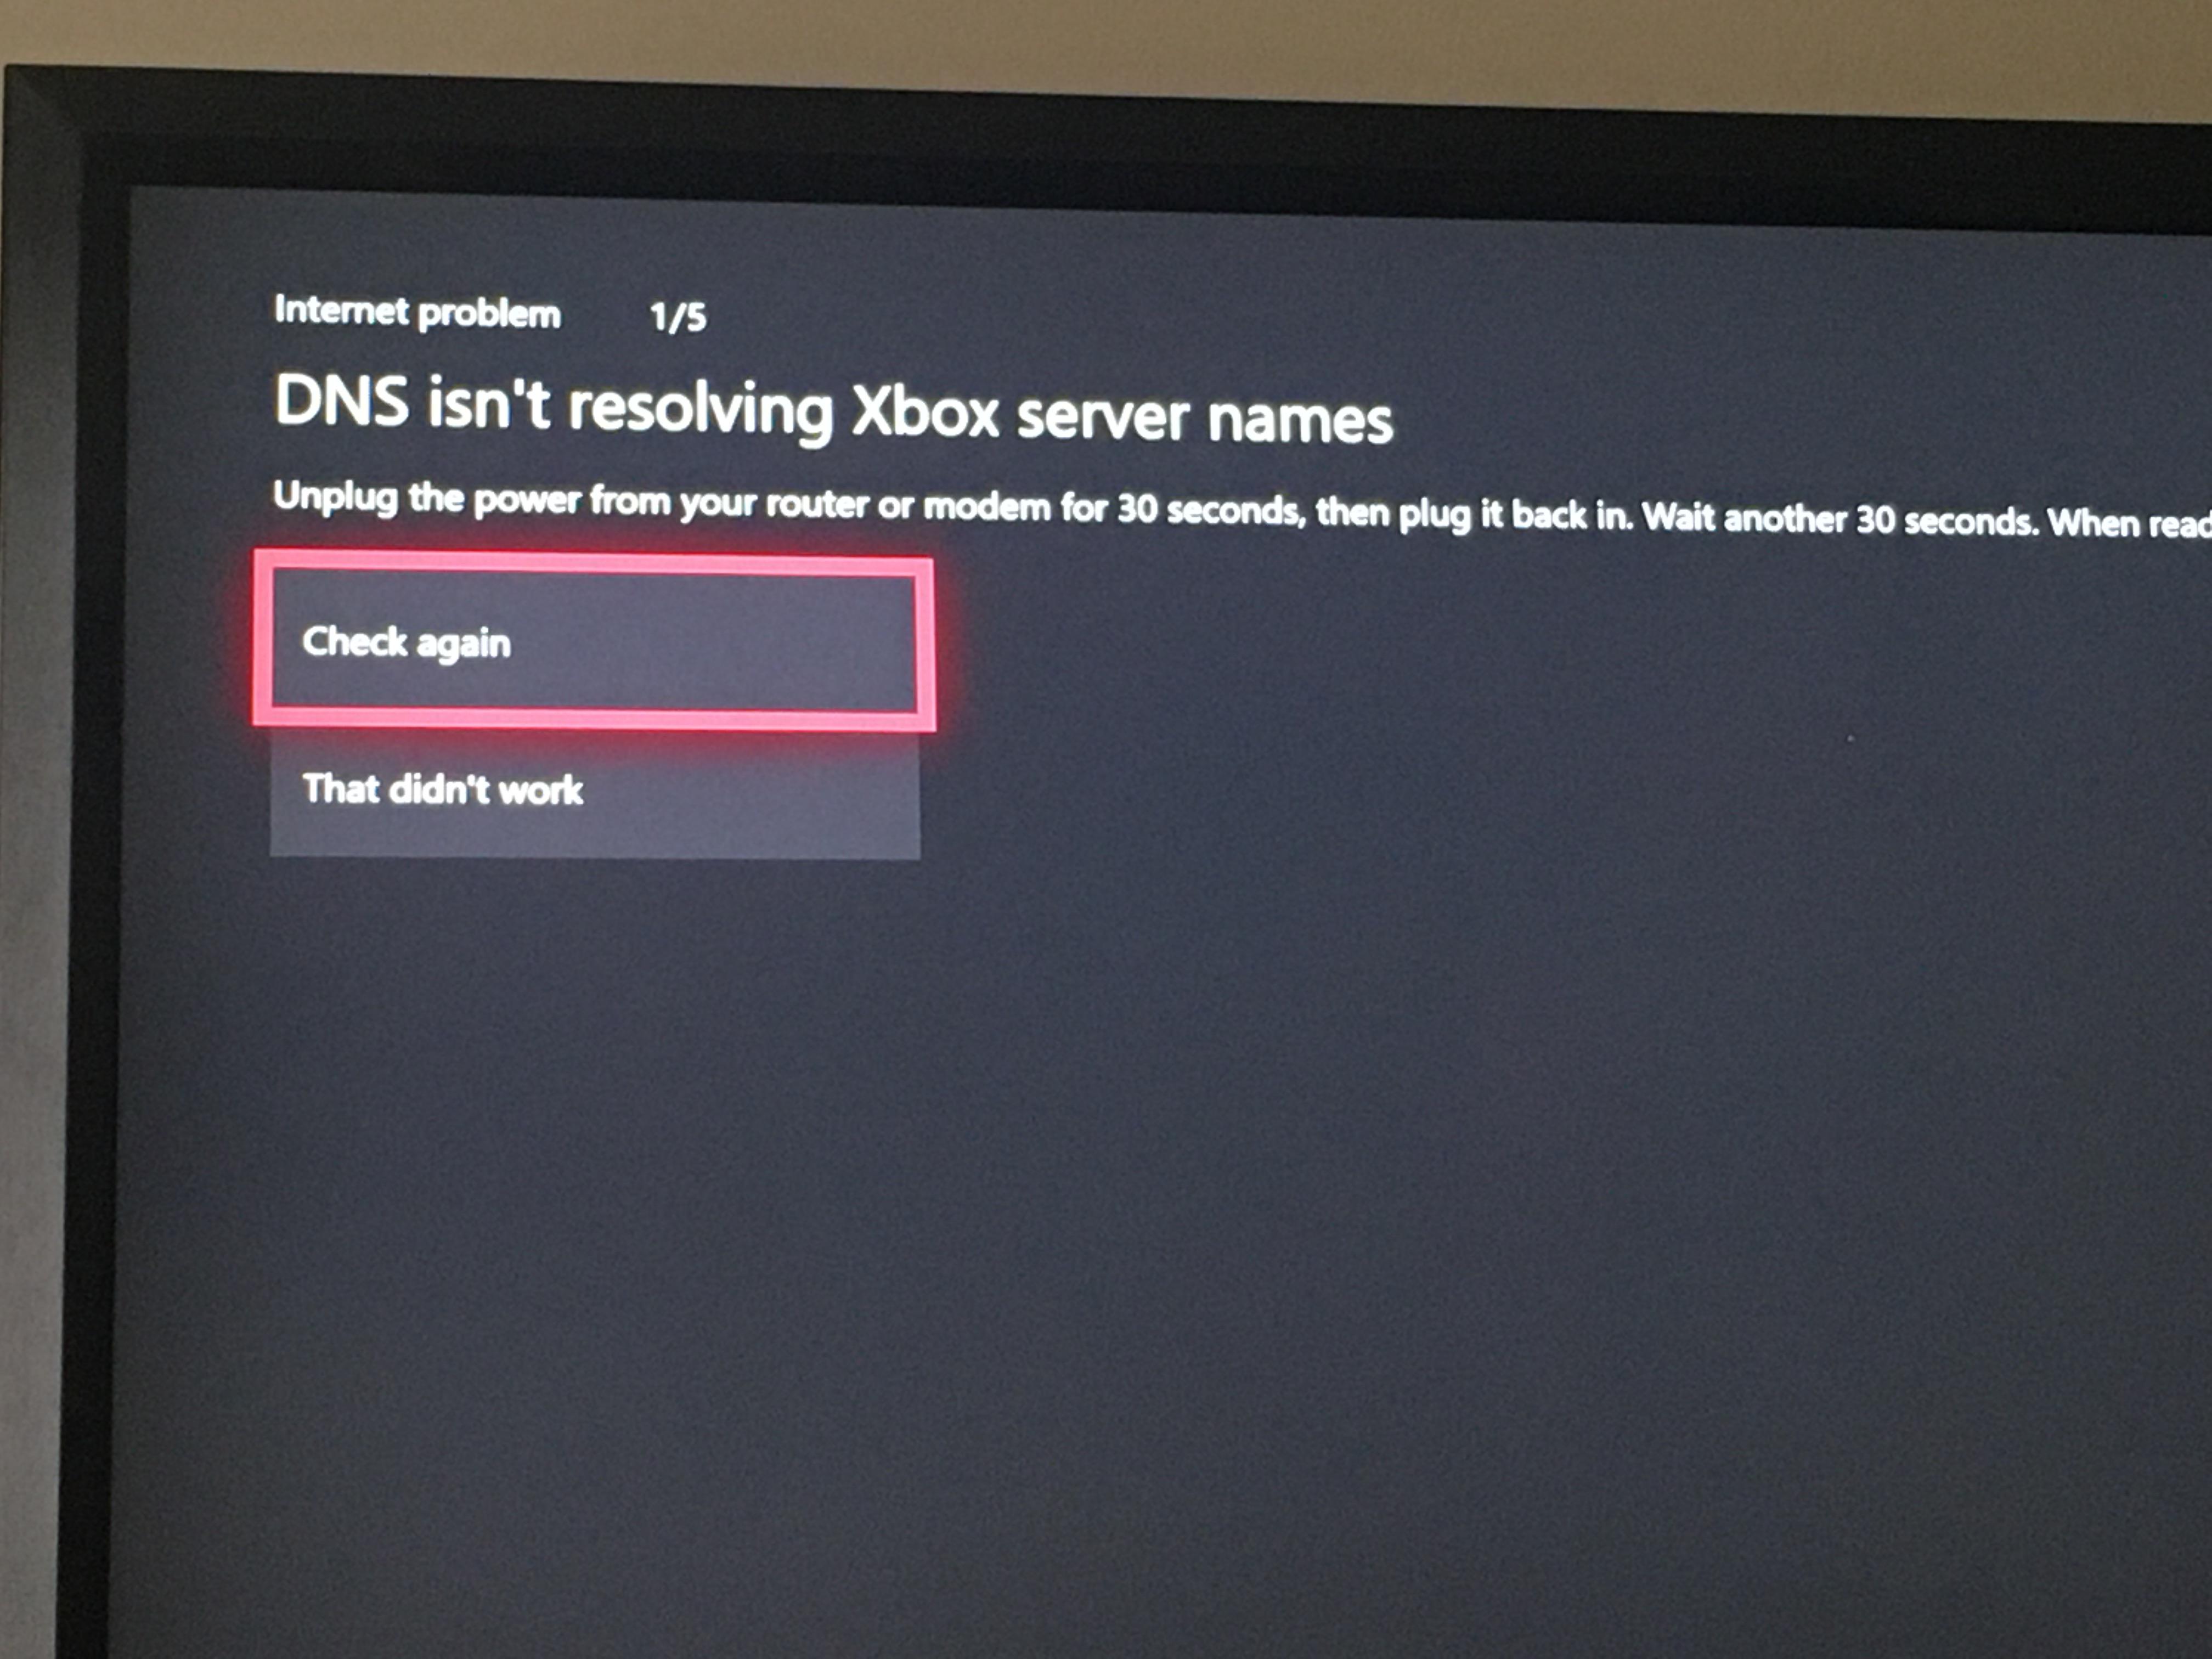
- Plug the power cable back into the modem first, and then into the router.
- Wait for the devices to fully restart.
Method 2: Update Your Network Adapter Driver
- Open Device Manager by pressing Win+X and selecting Device Manager from the menu.
- Expand the Network Adapters category.
- Right-click on your network adapter and select Update driver.
- Choose the option to Search automatically for updated driver software.
- Wait for the driver to be updated.
Method 3: Disable Power Saving for Your Network Adapter
- Open Device Manager by pressing Win+X and selecting Device Manager from the menu.
- Expand the Network Adapters category.
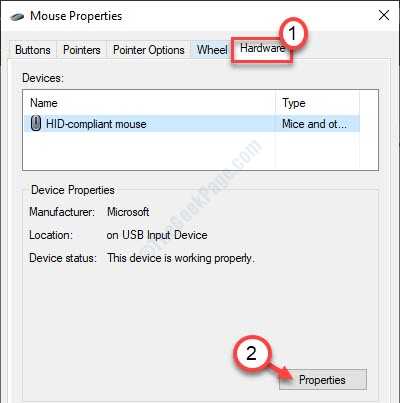
- Right-click on your network adapter and select Properties.
- Go to the Power Management tab.

- Uncheck the option that says Allow the computer to turn off this device to save power.
- Click OK to save the changes.
Method 4: Forget and Reconnect to the WiFi Network
- Click on the Network icon in the taskbar.
- Click on the WiFi network you want to forget.
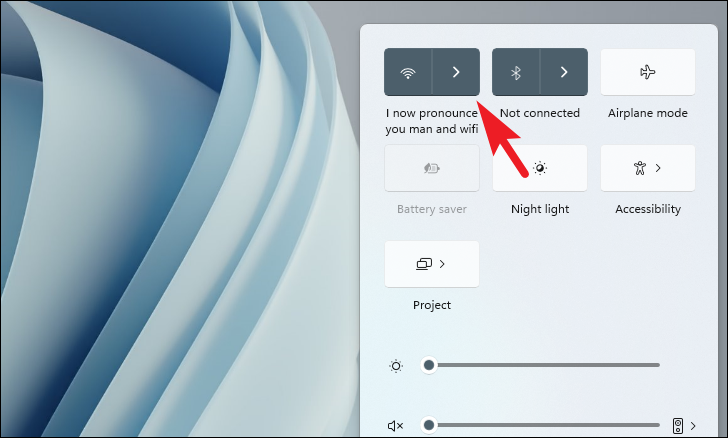
- Click on the Forget button.
- Select the network again from the list of available networks.
- Enter the password if prompted and click Connect.
Method 5: Reset TCP/IP Stack
- Open Command Prompt by pressing Win+X and selecting Command Prompt (Admin) from the menu.
- Type the following command and press Enter: netsh int ip reset
- Wait for the command to complete.
- Restart your computer.
Setting Your Home Network as Private
To set your home network as private and prevent your Windows 10 WiFi from disconnecting, follow these steps:
1. Open the Start menu and select “Settings.”
2. Click on “Network & Internet.”
3. In the left-hand menu, select “Wi-Fi” or “Ethernet,” depending on your connection.
4. Under “Network profile,” click on the currently selected network.
5. In the new window, select “Private” to ensure a more stable connection.
If the issue persists, it may be due to a power management issue. To fix this:
1. Open the Device Manager by searching for it in the Start menu.
2. Expand the “Network adapters” section.
3. Right-click on your WiFi adapter and select “Properties.”
4. Go to the “Power Management” tab and uncheck the option that allows Windows to turn off the device to save power.
If none of these steps solve the problem, consider updating your network adapter driver. Visit the manufacturer’s website or use Windows Update to ensure you have the latest driver installed.
Disabling WiFi Sense
If your Windows 10 WiFi keeps disconnecting, one possible solution is to disable WiFi Sense. This feature automatically connects to Wi-Fi networks shared by your contacts, which can sometimes cause connection issues. To disable WiFi Sense, follow these steps:
1. Open the Start menu and go to Settings.
2. Click on Network & Internet.
3. Select Wi-Fi on the left-hand side.
4. Scroll down and click on the Manage Wi-Fi settings link.
5. Under Wi-Fi Sense, toggle off the options for sharing networks with contacts and connecting to suggested open hotspots.
Disabling WiFi Sense can help resolve connectivity problems by preventing unwanted network connections. Keep in mind that this solution may not work for all cases, as there could be other reasons for your WiFi disconnecting. If you continue to experience issues, it’s worth checking for driver updates, ensuring your router software is up to date, and troubleshooting other potential hardware or compatibility issues.
Additionally, Fortect can secure your system and restore it to its pre-infected state, ensuring that viruses or malware aren’t behind the disconnections. It can also address causes of freezing or slowdowns, such as damaged registry or missing files, to ensure smooth operation of Windows and other programs.
Adjusting Power Management Settings
To adjust power management settings and prevent your Windows 10 WiFi from frequently disconnecting, follow these steps:
1. Open the Device Manager by right-clicking on the Start button and selecting “Device Manager” from the menu.
2. Expand the “Network adapters” category and locate your WiFi adapter.
3. Right-click on the WiFi adapter and select “Properties.”
4. In the Properties window, go to the “Power Management” tab.
5. Uncheck the option that says “Allow the computer to turn off this device to save power.”
6. Click “OK” to save the changes.
Adjusting the power management settings for your WiFi adapter can help resolve connection issues caused by power-saving features. By disabling this option, you ensure that your WiFi adapter stays active and connected at all times.
If you’re still experiencing WiFi disconnects after adjusting the power management settings, consider updating your WiFi adapter driver. You can do this by visiting the manufacturer’s website or using a driver update tool. Additionally, using an Ethernet cable for a stable and reliable connection is recommended if possible.
Running the Network Troubleshooter
If your Windows 10 WiFi keeps disconnecting, running the Network Troubleshooter can help identify and resolve the issue. To do this, follow these steps:
1. Click on the Start menu and search for “Network Troubleshooter”.
2. Select “Identify and repair network problems” from the search results.
3. The Network Troubleshooter will then run a diagnostic scan to identify any issues with your network connection.
4. If any problems are found, the Troubleshooter will provide instructions on how to fix them.
Note: It’s important to ensure that your drivers are up to date. Outdated drivers can cause connectivity issues. To update your drivers, go to the manufacturer’s website and download the latest version for your specific network adapter.
By running the Network Troubleshooter and keeping your drivers up to date, you can resolve common WiFi connectivity problems and enjoy a stable internet connection.
Resetting the Wi-Fi AutoConfig Service
If you’re experiencing frequent Wi-Fi disconnections on your Windows 10 PC, resetting the Wi-Fi AutoConfig service can help resolve the issue. Here’s how you can do it:
1. Press the Windows key + R to open the Run dialog box.
2. Type “services.msc” and press Enter to open the Services window.
3. Scroll down and locate the “WLAN AutoConfig” service.
4. Right-click on it and select “Restart” from the context menu. This will reset the service.
5. If the issue persists, right-click on the “WLAN AutoConfig” service again and select “Properties.”
6. In the Properties window, go to the “General” tab and click on the “Stop” button.
7. After the service has stopped, click on the “Start” button to restart it.
8. Close the Services window and check if the Wi-Fi disconnections have been resolved.
By resetting the Wi-Fi AutoConfig service, you can address any software-related issues that may be causing your Wi-Fi to disconnect frequently.
Updating Wireless Drivers
If your Windows 10 WiFi keeps disconnecting, updating your wireless drivers may solve the problem. Outdated or incompatible drivers can cause connectivity issues. Here’s how to update your wireless drivers:
1. Press the Windows key + X and select “Device Manager.”
2. Expand the “Network adapters” category.
3. Right-click on your wireless adapter and select “Update driver.”
4. Choose “Search automatically for updated driver software.”
5. Follow the on-screen instructions to complete the update.
Updating your drivers can improve communication between your PC and WiFi network, resolving connectivity problems. If you’re still experiencing issues, try these additional fixes:
– Disable power management for your wireless adapter: Go to Device Manager, right-click on your wireless adapter, select “Properties,” go to the “Power Management” tab, and uncheck “Allow the computer to turn off this device to save power.”
– Check for hardware issues: Ensure your WiFi adapter is securely connected and not damaged.
– Join the user community: Seek support from online forums or communities for specific hardware or software.
By updating your wireless drivers and following these steps, you can resolve WiFi disconnecting issues on your Windows 10 machine.
Updating Network Adapter Drivers
If your Windows 10 WiFi keeps disconnecting, it may be due to outdated network adapter drivers. To update them, follow these steps:
1. Press the Windows key + X and select Device Manager.
2. Expand the Network adapters category.
3. Right-click on your WiFi adapter and select Update driver.
4. Choose “Search automatically for updated driver software.”
5. Windows will search and install the latest drivers for your network adapter.
If this doesn’t solve the issue, you can also try uninstalling the driver and then reinstalling it using the same steps. Additionally, check if any power management settings are interfering with your WiFi connection. You can do this by:
1. Pressing the Windows key + X and selecting Device Manager.
2. Expanding the Network adapters category.
3. Right-clicking on your WiFi adapter and selecting Properties.
4. Go to the Power Management tab.
5. Uncheck the box that says “Allow the computer to turn off this device to save power.”
By updating your network adapter drivers and adjusting power management settings, you should be able to resolve the WiFi disconnection issue.
Uninstalling and Reinstalling WiFi Adapter Driver
If you’re experiencing frequent WiFi disconnects on your Windows 10 machine, the issue may be with your WiFi adapter driver. Uninstalling and reinstalling the driver can often resolve this problem. Here’s how to do it:
1. Press the Windows key + X on your keyboard and select “Device Manager” from the menu.
2. In the Device Manager window, expand the “Network adapters” category.
3. Right-click on your WiFi adapter and select “Uninstall device.”
4. Check the box that says “Delete the driver software for this device” and click “Uninstall.”
5. Restart your computer.
6. After the restart, Windows will automatically reinstall the driver for your WiFi adapter.
7. Check if the WiFi disconnect issue has been resolved.
If the problem persists, you may need to update the driver or try other troubleshooting steps. Consult the user community or refer to other resources for further assistance.
It is important to exercise caution when addressing the issue of why your Windows 10 keeps disconnecting from the internet, without unnecessarily exaggerating the severity of the problem. Download this tool to run a scan


