
Fix DNS Probe Possible Error on Windows 11/10 Chrome Edge
Are you experiencing DNS probe possible errors on your Windows 11/10 Chrome or Edge browser? Let’s explore some solutions to fix this issue.
Verify Internet Connection and Restart Router
To fix the DNS Probe Possible Error on Windows 11/10 Chrome Edge, start by verifying your internet connection. Check if other devices are able to connect to the Wi-Fi network. If they can, restart your router to refresh the connection. To do this, unplug the power from the router, wait for 30 seconds, then plug it back in. This should resolve any connectivity issues caused by the router.
If the issue persists, you can also try clearing your browser’s cache and cookies. In Google Chrome, click on the three-dot menu in the top right corner, go to Settings > Privacy and security > Clear browsing data. Select the time range and the types of data you want to clear, then click “Clear data.”
Another step you can take is to flush your DNS cache. Open the Command Prompt as an administrator and type ipconfig /flushdns to clear the DNS resolver cache.
If the problem continues, you may want to consider changing your DNS server to a public one like Google’s (8.8.8.8 and 8.8.4.4) or Cloudflare’s (1.1.1.1). This can often resolve DNS-related issues.
Modify DNS Settings and Servers
| Step | Description |
|---|---|
| 1 | Open Control Panel and navigate to Network and Sharing Center |
| 2 | Click on “Change adapter settings” on the left-hand side. |
| 3 | Right click on your network connection and select “Properties”. |
| 4 | Scroll down and double-click on “Internet Protocol Version 4 (TCP/IPv4)”. |
| 5 | Select “Use the following DNS server addresses” and enter the desired DNS server addresses. |
| 6 | Click “OK” to save the changes. |
Clear Browser Cache and Browsing Data
To clear the browser cache and browsing data in Windows 11/10 Chrome and Edge, follow these steps:
1. In Google Chrome, click on the three-dot menu in the top right corner of the browser window.
2. Select “Settings” from the dropdown menu.
3. Scroll down and click on “Advanced” to expand more options.
4. Under the “Privacy and security” section, click on “Clear browsing data.”
5. Choose the time range for which you want to clear the data and make sure “Cached images and files” is selected.
6. Click on “Clear data” to remove the cached files and browsing data from your browser.
In Microsoft Edge, follow these steps:
1. Click on the three-dot menu in the top right corner of the browser window.
2. Select “Settings” from the dropdown menu.
3. Under “Privacy, search, and services,” click on “Choose what to clear.”
4. Check the box next to “Cached data and files.”
5. Click on “Clear now” to remove the cached files and browsing data from your browser.
By clearing the browser cache and browsing data, you can potentially resolve the DNS Probe Possible Error on Windows 11/10 Chrome and Edge.
Additionally, Fortect can compare the current operating system with a healthy version and restore any vital system files required for running and restarting Windows without affecting user data.
Refresh or Flush DNS Configuration
After refreshing or flushing the DNS configuration, restart your computer to apply the changes. This can help resolve any DNS probe possible errors you may be experiencing on your Windows 11/10 Chrome Edge browser.
Disable VPN, Proxy, and Ad-Blocker
First, disable your VPN by disconnecting from the server and closing the application. Then, disable any proxy servers by navigating to your computer’s Control Panel, selecting “Internet Options,” and then the “Connections” tab. From there, click on “LAN settings” and uncheck the box next to “Use a proxy server for your LAN.”
You can also disable any ad-blocker extensions in your web browser. Open your browser’s menu, go to the “Extensions” or “Add-ons” section, and find the ad-blocker extension. Disable or remove it to see if that resolves the DNS Probe Possible Error.
After disabling these settings, try refreshing the webpage or restarting your browser to see if the error is resolved. If the issue persists, you may need to further troubleshoot your DNS settings or seek additional assistance.
Allow Browser Through Firewall and Disable Antivirus Temporarily
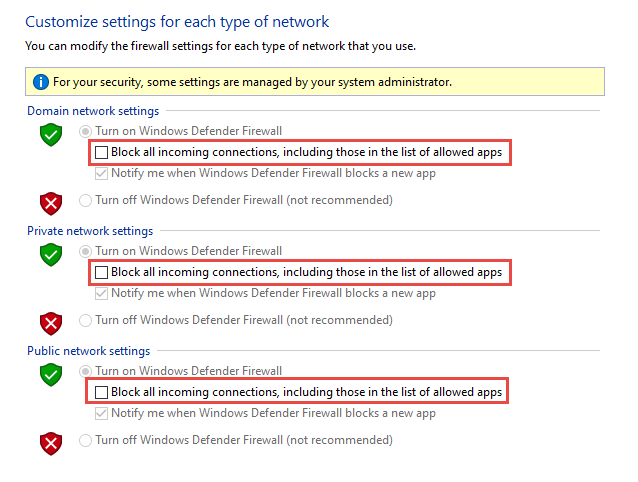
To fix the DNS Probe Possible Error on Windows 11/10 Chrome Edge, you may need to allow your browser through the firewall and temporarily disable your antivirus software. To allow your browser through the firewall, open the Control Panel and navigate to the “System and Security” section. From there, click on “Windows Defender Firewall” and then select “Allow an app or feature through Windows Defender Firewall.” Find your web browser in the list of applications and make sure it is checked for both private and public networks.
Next, you will need to temporarily disable your antivirus software. Locate the antivirus icon in your system tray or open the program from the Start menu. Look for an option to disable the antivirus temporarily and follow the prompts to do so. Be sure to re-enable your antivirus once you have resolved the DNS Probe Possible Error.
By allowing your browser through the firewall and temporarily disabling your antivirus software, you may be able to troubleshoot and fix the DNS Probe Possible Error on Windows 11/10 Chrome Edge.
Uninstall and Reinstall Network Drivers
First, open the Device Manager by pressing the Windows key + X and selecting Device Manager from the context menu.
Next, expand the Network adapters category and right-click on your network adapter. Then, select Uninstall device to remove the driver.
After uninstalling the driver, restart your computer. Upon restarting, Windows will automatically reinstall the network driver.
If the issue persists, you can manually reinstall the network driver by downloading the latest driver from the manufacturer’s website and installing it on your computer.
After reinstalling the network driver, restart your computer once again to apply the changes.
It’s possible that there could be a DNS probe issue, but it’s important to investigate further before jumping to conclusions. Download this tool to run a scan