Troubleshoot Local Area Connection Adapter Driver Errors
Having trouble with your local area connection adapter driver? Learn how to troubleshoot common errors in this article.
Identifying Hardware Issues
If you are experiencing errors with your local area connection adapter driver, it may be due to hardware issues. Here are some steps to help you identify and troubleshoot these problems.
First, check to see if the adapter is properly connected to your computer. Ensure that the electrical cable is securely plugged in and that there are no physical damages to the adapter or the port.
Next, examine the device manager to see if there are any issues with the network interface controller. Look for any warning symbols or error messages that may indicate a problem with the hardware.
If you are using a wireless network, make sure that the signal strength is strong and that you are within range of the access point. Weak signals or interference can cause hardware issues with your adapter.
It is also important to check for any overheating or physical damage to the adapter. Overheating can cause hardware malfunctions, so ensure that the adapter is properly ventilated and not exposed to high temperatures.
Lastly, consider updating the device driver for your adapter. Outdated or corrupted drivers can cause hardware issues, so it is important to keep them up to date.
Additionally, Fortect can identify and repair the causes of annoying slowdowns or freezing programs, ensuring that Windows and other programs run smoothly.
Resolving Software Conflicts
Uninstall and Reinstall the Local Area Connection Adapter Driver: To resolve software conflicts with the Local Area Connection adapter driver, start by uninstalling the driver from the Device Manager. Then, reinstall the driver by restarting your computer and allowing Windows to automatically install the driver again.
Check for Software Updates: Ensure that your operating system is up to date by checking for software updates. Sometimes, conflicts with the Local Area Connection adapter driver can be resolved by installing the latest updates for your operating system.
Run Network Troubleshooter: Use the built-in Network troubleshooter in Windows to diagnose and repair problems with the Local Area Connection adapter driver. This can help identify and resolve any software conflicts that may be causing the driver errors.
When troubleshooting software conflicts with the Local Area Connection adapter driver, it’s important to consider the impact of other devices and software on your network connection. Issues with the driver may be caused by conflicts with other network interface controllers, communication protocols, or device drivers.
If you’re experiencing ongoing issues with the Local Area Connection adapter driver, consider seeking professional assistance to diagnose and resolve the problem. A technician can investigate potential software conflicts and provide a more in-depth solution to the driver errors.
Checking Network Configuration and Connections
- Step 1: Open Control Panel by clicking on the Start button and then selecting Control Panel.
- Step 2: Click on Network and Sharing Center.
- Step 3: Check the status of your network connection under Change your networking settings.
- Step 4: Click on Change adapter settings to view the status and properties of your Local Area Connection.
- Step 5: Ensure that the network cable is securely plugged into the adapter and the router or modem.
- Step 6: If using a wireless connection, make sure the wireless adapter is enabled and connected to the correct network.
- Step 7: Restart your computer and test the connection again.
Seeking Additional Assistance
If you are experiencing issues with your Local Area Connection adapter driver, you may need to seek additional assistance to troubleshoot and resolve the errors.
First, you can try rebooting your computer to see if that resolves the issue. Sometimes a simple restart can fix driver errors.
If that doesn’t work, you can try resetting the Winsock catalog using the command prompt. Open the command prompt as an administrator and type “netsh winsock reset” and then press enter. This can help reset the network interface and resolve driver errors.
Another option is to update or reinstall the network interface controller driver. You can do this by going to Device Manager, finding the network adapter, right-clicking on it, and selecting “Update driver” or “Uninstall device” and then reinstalling the driver.
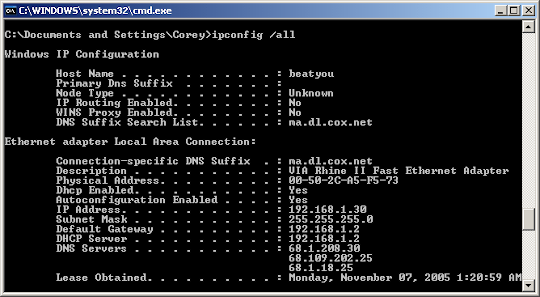
You can also try resetting the Dynamic Host Configuration Protocol (DHCP) and Domain Name System (DNS) settings. Open the command prompt as an administrator and type “ipconfig /release” and then “ipconfig /renew” to reset the DHCP settings. You can also try flushing the DNS cache by typing “ipconfig /flushdns” in the command prompt.
Check the settings for the default gateway and make sure they are configured correctly. Sometimes incorrect settings can cause driver errors.
If you are using a wireless network, check the settings for the wireless adapter and make sure they are correct. You can also try disabling and re-enabling the adapter to see if that resolves the issue.
For ethernet connections, make sure the cable is securely connected and not damaged. A faulty cable can cause driver errors.
My local area connection adapter is not working, so I’m unable to connect to the internet. Download this tool to run a scan