
Up and Running with React in 10 minutes – User friendly Tech help
“All great achievements require time…. Maya Angelou”
nWe already learned how to create our first Angular.io App in 10 minutes, this time we’ll repeat the same with React library.So lets get started.
n
nKey terminologies in react app
n
nBrush up :-
nWe already know that in React we play with Javascript and embed html inside the jsx files to create our components.
n
nJSX is awesome, but it does need to be transpiled into regular JavaScript before reaching the browser. We typically use a transpiler like Babel . We can run Babel through a build tool, like Webpack which helps bundle all of our assets (JavaScript files, CSS, images, etc.) for web projects. n
n
Create React App Package:-
nWe are going to use this tool l to get started in building a React app, as it sets up everything we need with zero configuration.
n
npm install -g create-react-app
n
Note:- This will globally install the react app, containing the babel(for trans piling), web pack (for creating the build and hot reloading)
n

n
create-react-app contact-app
n
cd contact-app
n
npm start
n
It’ll run our react app on localhost:3000
n
n
Modify src/App.js
n
This file contains the component (App) which is getting rendered in the browser. Incase we open and change this file the same will be reflected on the UI.
n
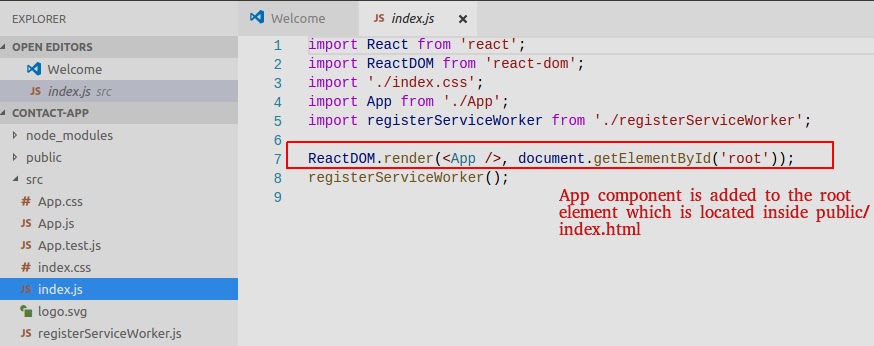
How is the App component rendered on the UI? If we open the “src/index.js” file it will show the binding to UI and its attached to “root” element inside the “public/index.html”.
n
n
nCreating our own Components:-
n
Components are the building blocks of react application.Thus it helps in breaking our UI into small applications that are working on DOT(do one thing) principle. Components give us the power of encapsulation ( hiding all the details).
n
Lets create our first component say “ContactList” inside “App” file and use it inside the App component and use it.
n
n
Lines 7-25 , shows the newly created component
n
Line 34, is where we have used the component
n
n
1 2 3 4 5 6 7 8 9101112131415161718192021222324252627282930313233343536373839 |
n
import React, { Component } from 'react';
n
n n n ) }} n Welcome to ContactList Appn
|
n
Playing with Props:-
n
Now in above case we hard coded the values of “people” array inside the contactlist component, incase we want that each component should show different contacts so we can use props feature available in React.
n
n
a)Replace the code for const people = this.props.people (Line 6)
n
b)Pass props inside the contactlist component. (Line 25 & 31)
nNow we can see that we used “ContactList” component twice (line 25 & 31) inside the App component and its displaying different contacts based on the “prop” parameters. 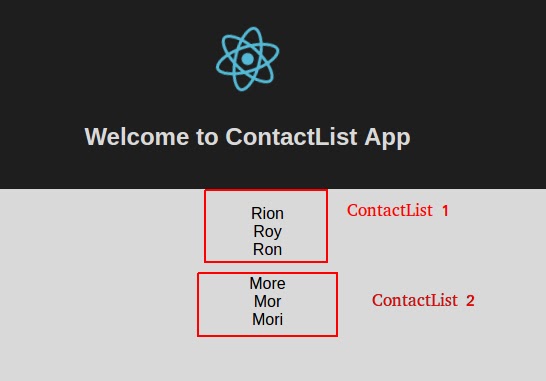
n
1 2 3 4 5 6 7 8 9101112131415161718192021222324252627282930313233343536373839 |
n
//Creating our own component n
n n n ) }} n Welcome to ContactList Appn
|
nWith this tutorial we are up and running with React App, we learned about components, how to use them and how to pass property to a component and making them reusable.n