
Creating first test case using Jmeter? – User friendly Tech help
Scenario:- How to create a basic level test case(its called test plan) in jmeter?
n
Most of us things that ppl r born smart, but truth is 99% of the smartest ppl n this world are driven by commitment to learn, learn and learn more.Learn more and share more 🙂 Fb,G+,Twitter
n
Prerequisites:-
n1.Test plan :- Container for running the tests. Its the starting point, by default jmeter opens up with test plan.
n
n2.Users(called as Thread Group in JMeter) :- How many users should be involved in sending the request to the server, how often, and ramp up time.
nWhy this ? it mimics the interaction of real users with the application at given time.
n
n3.Task( what type of request that needs to be send to server, called as Samplers):-For example if we want to access the google.com we are sending http request thus we need a particular type of sampler called http request sampler. If we are sending request to database we make use of jdbc sampler.
n
nNote:- JMeter sends request to server based on the order they appear in the tree.
n
n4.Assertions:– Verify the response send by server, comparing the actual value with expected value.
n
n5.Report(called as Listeners in JMeter):- Request is send to server how to report the results for the response, we use Listeners for this.
n
n
n
nSolution:- Lets create a pipeline for the above steps,
n
ThreadGroup (We created users) > Samplers (users send request to server) > Assertions (Verify the response for the request) > Listeners (Report the response results as graphs, table and so on).
n
nStep1:–Launch jmeter
nStep2:-Add thread group
nNote:- We have renamed the test plan in our example below.
n
Right click Test Plan > Add > Thread(Users) > Thread Group
nRename Thread group to something logical.
nChange the thread properties like number of users.
n
n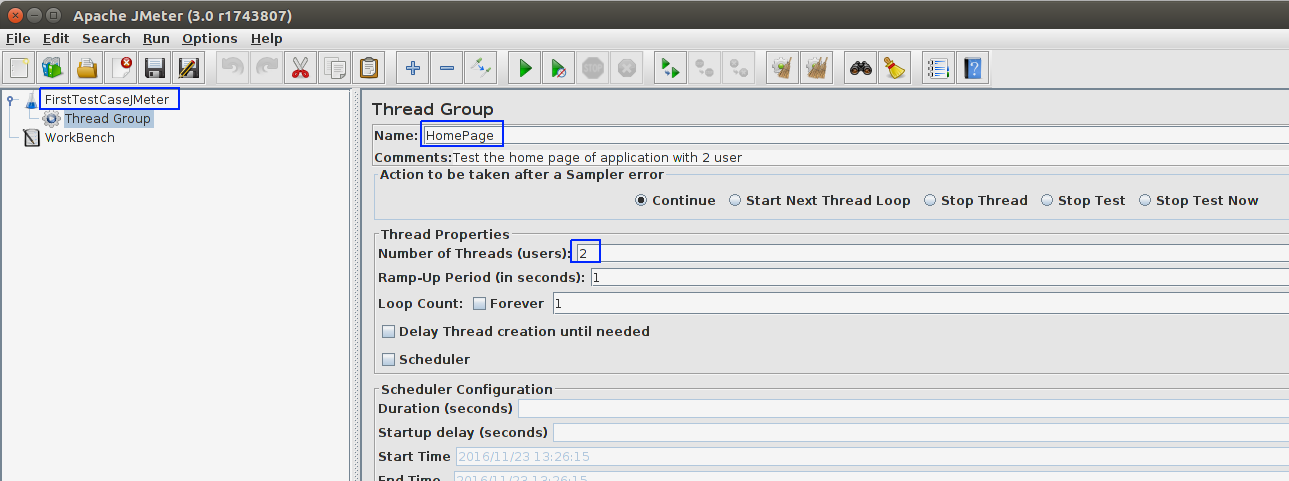 n
n
nStep3:-Add sampler
n
Right click Thread Group > Add > Sampler > HTTP Request
nRename it something logical
nDefine user defined variables for a test plan (FirstTestCaseJMeter) .
n
- n
- Open test plan
- click on Add
- Enter name and value
n
n
n
n
Why this as it add to maintainability of application url at one place.
n n
n
Add APP variable into the Sampler “Server Name” like ${APP}(this is how we use variable value in jmeter ${variableName}
n
Select the method as “GET”
n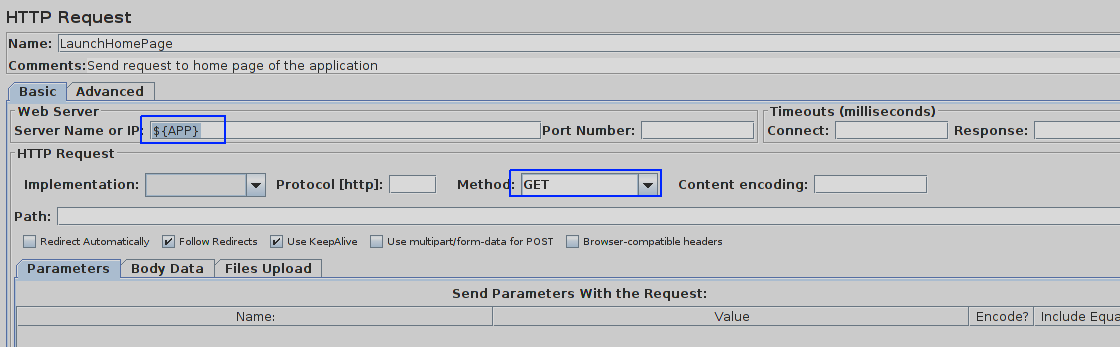 n
n
Note:-Incase we need to pass any parameters or body elements we can do it here.
n
nStep4:-Assertions (say to check 200 status code)
nRight click Thread Group > Add > Assertions > Response Assertion
nSelect ReponseCode and Equals, put value as 200
n
n n
n
nStep5:-Listeners (Report the run results)
nRight click Thread Group > Add > Listener > View Result Tree
n
Step6:-Run the test plan
nBefore running we need to save the .jmx file
nWays to run :-
n
- n
- Run > Start
- Ctrl + r
- Green play button on the menu bar
n
n
n
n n
n
Step7:-Check the run results
nSelect View Result Tree
nIts green, means our assertion is successful and we got the response back 🙂
n
n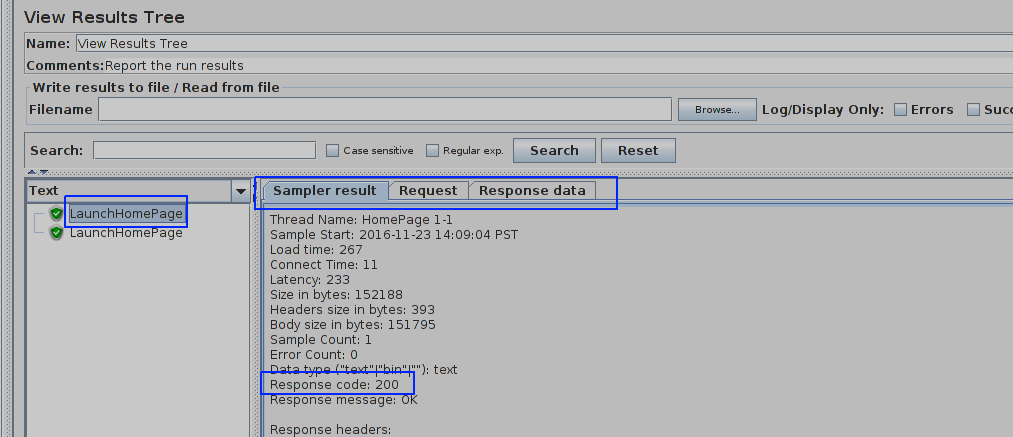 n
n
nSo we successfully created the basic test plan in jmeter. To explore more change the listener type, add more users and add different type of assertions.
n
nLearn more and share more.
n